Sunday, June 26, 2011

The Coconut Macaroon


I love coconut macaroons. To me, the perfect macaroon is chewy on the outside and moist on the inside. The best ones I've ever eaten were in San Francisco. Despite my ardent fondness for them, I'd never tried to make them before.

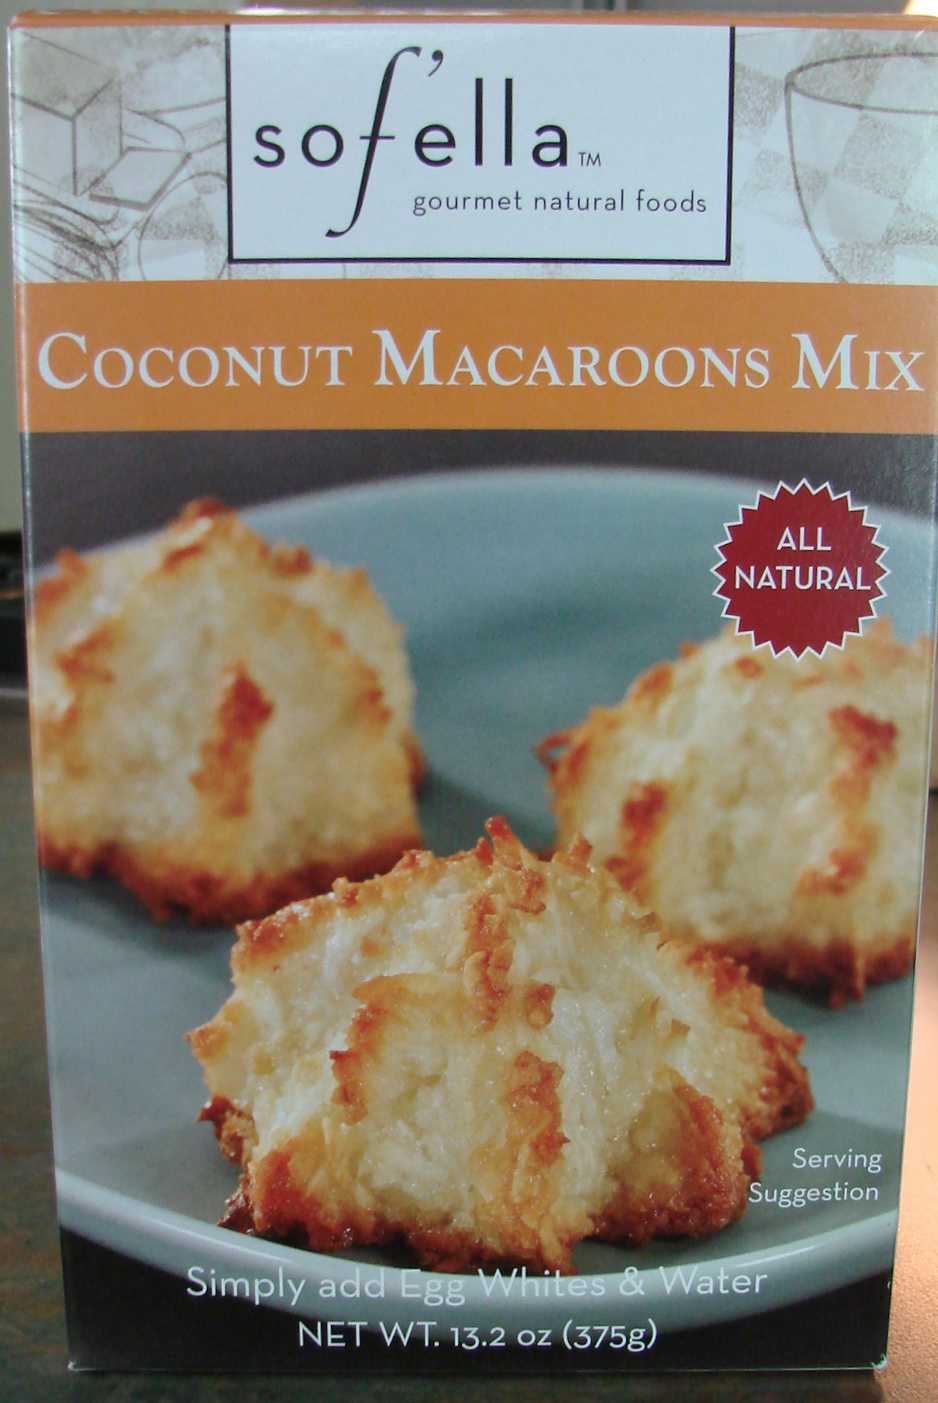
I found this coconut macaroon mix at World Market the other day. I was impressed with the fact that it was made from ALL NATURAL ingredients. You simply add water and egg whites. It couldn't be easier.

Beat the egg whites and water with an electric mixer.

Pour into a medium bowl with the macaroon mix and beat until moistened.

Roll into balls and place on a cookie sheet lined with parchment paper. Bake according to the directions. I baked mine baked at 325° for about 20 minutes.

Until they were golden brown. Mmmmm.


They were delicious! Moist on the inside and chewy on the outside. I highly recommend this mix if you are a fan of the macaroon.


Though I wouldn't mind a trip back to San Francisco...

Tuesday, May 24, 2011

Cheesecake in a Jar

These individual cheesecakes are really fun to make and absolutely delicious. This recipe came from i am baker, which is an adorable blog, and different versions of it can also be found at several other sites if you want to google it. It is similar to the Pies Baked in a Jar post that I did, but easier because you don't have to bake it. I had never made a no-bake cheesecake before, but it is definitely the way to go with these. These would make great party favors or teacher gifts, and would be perfect for a picnic.

Cheesecake in a Jar

12- half pint ball jars
1 - 1/2 cups graham cracker crumbs
2/3 cups melted butter
6 tbsp sugar
3- 8 oz. packages cream cheese softened
3- 14 oz. cans sweetened condensed milk
1 1/2 tsp vanilla
1 can cherry pie filling

Yield: 12


I used these really cute, squatty, half-pint Ball jars. I found them at Winn Dixie. You can use whatever size and shape you want.

Combine graham cracker crumbs, butter, and sugar in a medium bowl.

Make sure your jars are clean and dry.

Place about 2 tbsp crumbs into each jar.

Lightly press into the bottoms of the jars, as Zac so expertly demonstrates.

Beat softened cream cheese and condensed milk. Add vanilla.

Spoon dollops of the cream cheese mixture into the jars.


Top with the cherry pie filling. I used only one can of it, but I left 3 of the cheesecakes without topping for those who might prefer theirs unadorned. If you like a lot of cherries, you might want to get 2 cans.

This is how they looked. I didn't go above the rim with the filling and topping.

Chill for several hours or overnight.

Oh my gosh. They are so good, and so cute.

They stack and travel well, too.

They were the finishing touch to lunch I took today for some very sweet folks at the Christian Service Mission. They have been tirelessly working since the tornadoes struck Birmingham. A big thanks to them and to all of their volunteers!


Monday, April 18, 2011

Easter Cupcakes

I wanted to make some special Easter treats and I decided to bake cupcakes! I used Duncan Hines Butter Recipe cake mix for the cupcake and my buttercream recipe for the icing. The instructions can be found here.

I bought these cute cupcake liners at Michaels.

These are felt Easter stickers that I also found at Michaels. I thought they would be fun as cupcake decorations.

So I lifted the backing and placed a toothpick on the sticky part...

...then I covered the toothpick with the backing.

Voila...instant cupcake decorations. I actually ended up cutting a tad off the ends because they were extra long toothpicks.

I used clear and colored sugar on the cupcakes.

A virtual Easter menagerie.

I am taking them to work tomorrow as a surprise. Shhhh...don't tell!


Wednesday, April 13, 2011

Bacon Tomato and Turkey Pizza

Here is a quick and easy after work supper! It is like an open faced sandwich in pizza form.

Bacon Tomato and Turkey Pizza

pizza crust
deli smoked turkey, chopped
chopped tomatoes
grated cheese
mayo
cooked, crumbled bacon (or Hormel real bacon bits)

Lightly spread mayo on the pizza crust. Top with turkey, tomato, bacon, and cheese. Black olives are also good on this. Bake at 350 for about 15 minutes.

I like the Boboli 100% Whole Wheat pizza crust. It is Original and has GREAT ITALIAN TASTE.


Soooo yummy...

I made a pasta salad to go with it.

It is a great combo and is satisfying without making you feel too full. As long as you don't eat it all yourself.

Saturday, April 09, 2011

Easter Egg Candles

This is an Easter craft that is fairly involved, but lots of fun. I got the idea from here. Zac and Alex did this with me. You can find all you need for this craft at Michaels. Well, except the vinegar and eggs. Dollar Tree has some of these supplies as well.

Items needed:
eggs
Easter egg dye (we used Paas)
vinegar
egg cups or tiny clay pots
acrylic paint & paintbrushes
candle wax
wicks

Tap the top of each egg and gently break it open. Empty the contents, as Alex so aptly demonstrates. If you are neat and don't drops eggshells into it, you can use the eggs in a recipe. (On a side note, our eggs were full of eggshells. So much for my lofty quiche plans.)

You can see from this picture how large an opening we left on the tops of the eggs.

The Paas kit had tablets to dissolve in vinegar as well as some packets of a more concentrated dye. We used both.

We used these cups to dye them in. Just use whatever technique you want to, being very careful not to crack the eggs.

Crafters hard at work. Gil got involved as well.

We couldn't find egg cups, so Zac had the idea of using these small clay pots from Michaels. They were the perfect size. We painted them with acrylic paint.


I like to save soup containers from our Chinese takeout. I used it to melt the candle wax in the microwave. Soy wax takes a lot less time to melt, but is more expensive. For both kinds of wax, I microwave on high at 2 minute intervals until it's melted.

I used a measuring cup to dip into the wax and pour into my eggshells. Now I'm craving Hot and Sour Soup.

Zac and Alex used a funnel.


Once you have poured in the wax, roll the top of the wick around a pencil and gently lay the pencil on top of the egg. Make sure the metal piece at the bottom of the wick touches the bottom on the inside of your eggshell.

Let them sit like this until the wax hardens.

Here are Zac and Alex's candles. Alex painted her clay pots with pretty pastels. Zac's are kooky. Shocker.


I decided to paint my clay pots white. I plan to use them on my Easter table on the porch. I will post that when I do it.

I highly recommend this project! Just allow yourself plenty of time. And buy lots of eggs.


Wednesday, March 30, 2011

Birdcage Candleholders

I am glad that spring is here for many reasons, one of which is getting to have dinner on the back porch again. I was having girlfriends over the other night and wanted to add a couple of fun new things to the porch to welcome my guests. I was at T J Maxx, and about to buy a large lantern for a candle, when Zac talked me into buying a large birdcage-esque container. Considering its size, I was surprised it was only $24.

I already had this uber cool moss ribbon that I purchased in Fairhope, and have just been waiting for a reason to use it.

I threaded it around the bottom of the cage.


I placed a pillar candle into a glass cylinder and then sat in on a wrought iron stand. It fit inside perfectly.

I covered the table with one of my favorite old tablecloths.


It made for a nice cozy welcome.

Oh, and I liked the black one so much that I bought this pretty white one, too. This one came from Garden Ridge. It was only $14.

These birdcages are a beautiful, yet inexpensive way to add a lovely bit of candlelight to any part of your home. Thanks, Zac.