Wednesday, February 25, 2009

Yellow Split Pea Soup with Ham

I like to shop at several different grocery stores because when I offer myself a variety of items to choose from, I often discover interesting things I wouldn't find otherwise. I was at Winn Dixie the other day and noticed these yellow split peas. I had never seen yellow ones before and decided to try them. If you want to be cooler and more current and relevant than Winn Dixie, you can find them at places like Whole Foods, also. As you can see, they are RICH IN FIBER. They are also low in calories and fat and a good source of iron.

I cooked the peas with my favorite soup spices until they were mushy and used them as the base of the soup. Then I added ham and simmered it for a few minutes. It was amazingly delicious. And really easy. It is now one of our favorite soups.

Yellow Split Pea Soup with Ham

1 lb dried yellow split peas
6 cups water
1 tsp thyme
2 tsp salt
1 tsp oregano
2 bay leaves
1 medium onion, chopped
2 tbsp flour
2 tbsp butter
2 cans chicken broth
1 ham steak, cut into cubes

In a medium saucepan, cover peas with 6 cups of water. Add oregano, salt, thyme, and bay leaves. Bring to a boil. Reduce heat, cover and simmer for about an hour.

In a larger saucepan, sauté onion in butter until tender. Add flour and stir until blended. Add chicken broth and heat to boiling, stirring with a wire whisk until blended and thickened. Stir the peas with a whisk until smooth and creamy, then add the peas and ham to the thickened broth. Simmer for about 10 minutes.
Yield: about 6 servings

Cook the peas for about an hour. They will be mushy:
Sauté onion until tender:

Add flour and blend:


Add chicken broth and bring to a boil, stirring with a whisk until thickened:

Blend peas together until creamy before adding to the chicken broth:

Blend the peas into the broth, add ham, and simmer for a few minutes:
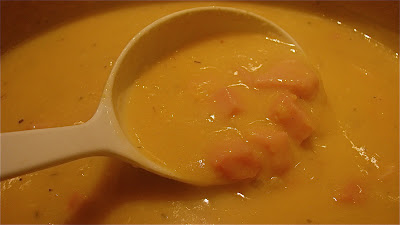
Oooooo....... it is great comfort food. And RICH IN FIBER.

I served it with whole wheat rolls.

Sunday, February 22, 2009

Crispy Cheddar Wafers


This is a crunchy and delicious cheese cracker that would be a perfect savory appetizer, especially for a shower. They are also great just for snacking.

Crispy Cheese Wafers
2 cups grated sharp cheddar cheese
2 sticks butter, softened
2 cups flour
2 cups Rice Krispies
1/2 tsp cayenne pepper

Combine ingredients in a large bowl. Roll into small balls and place on a parchment-lined cookie sheet. Press with the tines of a fork to flatten. Bake at 350 for 10-12 minutes. Cool on a wore rack.
Yield: approximately 3 dozen, depending on size


Combine ingredients in a large bowl:

Roll into balls and place on a parchment-lined cookie sheet:

Flatten with a fork:


Bake at 350 for 10-12 minutes. Transfer parchment to a wire rack to cool:


Enjoy!

Saturday, February 14, 2009

Chocolate Pots de Créme

I found this recipe on one of my favorite food blogs, which is Big Red Kitchen. I made these in a matter of minutes and they are fabulous. I made a couple of minor changes, which included an extra tablespoon of sugar and the addition of vanilla. I also did not have 2 cups of whipping cream, so I substituted 3/4 cups of whipping cream and 1 -1/4 cups of half and half.

Chocolate Pots de Créme

6 egg yolks
1/2 tsp kosher salt
3/4 cups whipping cream
1 - 1/4 cups half and half
3 tbsp sugar
6 oz semisweet chocolate (I used Ghirardelli morsels)
1 tsp vanilla
2 tbsp Kahlua

In a blender blend salt and egg yolks for 2 minutes on high speed. Set aside. In a medium sauce pan over medium heat scald cream and sugar. Do not boil. Add the chocolate and stir with wire whisk until melted and smooth. Heat for about 3 minutes longer, the mixture should be very hot and on the brink of boiling but do not let it boil. Transfer the chocolate to a liquid measuring cup. With the blender on medium speed pour a small amount of the hot chocolate through the opening in your blender lid. Blend. Slowly continue to pour the rest of the chocolate into the egg mixture and blend until smooth. Add vanilla and Kahlua and blend a few seconds more. Pour into demitasse cups, ramekins, or shot glasses. Chill until set.

Makes 8- 1/3 cup servings.


Blend salt and egg yolks in a blender:

Scald milk with sugar, but do not boil:

Add chocolate morsels and stir with whisk until melted. Cook for 3 more minutes but, again, do not let it boil:


Pour mixture into a measuring cup:

With blender set on high, slowly pour the chocolate mixture in with the egg yolks. Add vanilla and Kahlua.

Blend until smooth:
Pour into small containers and chill for several hours. I used espresso cups.

Saturday, February 07, 2009

Crackers for All Occasions

Many, many years ago, when I attended the University of Montevallo, I was in a sorority (go Chi-O). As a gesture of kindness, my pledge class decided to honor each member with a tiny gift from each of us. Since I was living off my limited college budget, I couldn't spend much. I did want each gift I made to be special, though. There were no scrap booking implements and very limited craft supplies back in the 70's, so I had to improvise.

I collected toilet paper rolls, paper towel rolls, and wrapping paper rolls. I cut them to toilet paper roll size, covered them with plain white tissue paper, filled them with bubble gum and Hersey Kisses, and tied each end with curling ribbon. Then I decorated them with those peel and stick stars that teachers would put on your papers back then. Remember those? It brings back piano lesson memories (ugh). I also personalized them with peel and stick gold lettering.

A few years later, I heard of the Christmas cracker, which is a far more sophisticated version of what I had made. Invented in 1846, it makes a popping sound when opened. Despite that remarkable feature, the ones I saw (at Williams-Sonoma, and other such places), contained cheap little prizes, similar to what you would get in a Cracker Jack box. So when I started making them again, I decided to fill them with good candy. I made some for Christmas, and I just made some more for Valentines' Day. These are easy and inexpensive to make and can be used year-round for all occasions. They don't make a popping sound, but are still fun to open.


Materials needed:

cardboard for templates
toilet paper rolls
tissue paper
scrapbook or wrapping paper
glue stick
a scissor
ribbon or twine for tying
candy, tiny toys, or romantic notes

Make templates out of cardboard. One should measure 4" x 6" and the other 8" x 10". The tissue paper is cut to 8 x 10 and the scrapbook paper cover is cut to 4 x 6.

Cut two sheets of tissue paper by the template. Apply glue to each layer on the long ends (the end that measures 10") of the paper. Apply only on the area where the roll will be attached.

Lay the roll on top of the end where you just applied the glue.

Roll the tissue around it tightly and make sure the other long end has plenty of glue on it as well.
These are a couple of pretty pieces of scrapbook paper I found at Michael's. I thought they would be perfect for Valentines' Day.

This one actually has stitching on it.

Using the smaller template, trace and cut out the paper you want to cover the tissue with.

Apply a generous amount of glue to each (3") end. The thicker the paper you use, the more glue you will need for it.

Making sure to keep it centered, apply the cover to the roll.

Gather the tissue on one end and tie with ribbon. Then fill with candy. I used Snickers Fun size. It will hold four of them. I have also used Tootsie Rolls, Smartees, and Werther's Butter Candy. Then tie the other end. Sorry I don't have a picture of tying the ribbon.

It is also fun to use a variety of tissue paper. I found this at the Container Store in Atlanta. I never go to Atlanta without a visit to the Container Store.

I found this handmade-looking tissue paper at World Market. I rarely drive down 280 without a visit to World Market.

These are my Valentine crackers. The vintage print paper is featured in my last post.

These are some of the crackers I made for Christmas. They are also very cute tied with twine.

You could also personalize these for some very unique place cards.

Paper Made From Fabric

I found this vintage-looking valentine fabric years ago at Hancock Fabrics and have yet to see any more this cute. I had only scraps left, so I wanted somehow to preserve and perpetuate it.

I decided to make a copy of it on my color copier. It could not have been simpler.


I loved the results. It printed beautifully. Hopefully it will not drink my entire ink supply.
The one on the left is printed on a cream colored card stock and the one on the right is plain white copy paper.

I am looking forward to experimenting with using fabric like this, but that will come in later posts. For now I am on to some valentine projects!