I realized that I didn't have any Halloween scrapbook paper, so I searched online and found a great website from the UK called Activity Village. They had some very fun patterns.
Wednesday, October 26, 2011
Super Creepy Halloween Crackers
We had a Halloween lunch at work the other day, and I wanted to make some special treats for my friends. I decided to make personalized Halloween crackers filled with candy. The full tutorial with measurements, etc, can be found here.
I realized that I didn't have any Halloween scrapbook paper, so I searched online and found a great website from the UK called Activity Village. They had some very fun patterns.
I printed the paper onto 8 1/2 x 11 white card stock. You can cut two from each page.
I organized my candy so that everyone got the same amount.
I made personalized labels with a very scary font that I found on dafont.com. I also added spooky eyes.
And, voila! A basket full of super creepy treats.
I realized that I didn't have any Halloween scrapbook paper, so I searched online and found a great website from the UK called Activity Village. They had some very fun patterns.
Sunday, October 23, 2011
Mossy Pumpkin Wreath
(Sorry I have been away from here for so long! I've been busy with work, family, and other various doodads. I have several ideas just waiting in the wings, and I should be able to get them posted over the next several days.)
Autumn is such cozy time of year and I love to decorate for it. I wanted to do a wreath for my back porch door and I found a picture of a beautiful one on Pinterest. There was no tutorial for it, so I had to improvise. It turned out to be really fun, although it was a bit time-consuming.
The supplies you will need are:
styrofoam wreath, preferably green, not white like mine
green paint (if your wreath turns out to be white like mine)
2 large bags of moss
about 5 small pumpkins
hot glue gun
long strip of burlap
Mod Podge Clear Acrylic Sealer
As I mentioned, my wreath was white, so I had to paint it. Mossy green spray paint would have been an ideal choice, but all I had were various shades of green acrylic paint, which I mixed together.
Oddly enough, it worked.
I painted it on the wreath and it took a couple of hours to dry. You don't have to cover it perfectly.
Once the paint is dry, you can glue the moss onto the wreath a piece at a time. I tore some of it to fit. I don't have a photo of this step. Sorry. It's probably because I was too busy burning my fingers.
Once the moss is on the wreath, glue the pumpkins on. Make sure you use lots of glue. After I glued them on, I interspersed bits of moss between the pumpkins and glued that in as well. You will be able to see that in the last photo. Spray with acrylic sealer. The moss will shed if you don't.
I tied on the burlap strip as a hanger and hung it on my door.
I recommend this project! It was fun to do and I loved the result.
Autumn is such cozy time of year and I love to decorate for it. I wanted to do a wreath for my back porch door and I found a picture of a beautiful one on Pinterest. There was no tutorial for it, so I had to improvise. It turned out to be really fun, although it was a bit time-consuming.
The supplies you will need are:
styrofoam wreath, preferably green, not white like mine
green paint (if your wreath turns out to be white like mine)
2 large bags of moss
about 5 small pumpkins
hot glue gun
long strip of burlap
Mod Podge Clear Acrylic Sealer
Once the moss is on the wreath, glue the pumpkins on. Make sure you use lots of glue. After I glued them on, I interspersed bits of moss between the pumpkins and glued that in as well. You will be able to see that in the last photo. Spray with acrylic sealer. The moss will shed if you don't.
I recommend this project! It was fun to do and I loved the result.
Sunday, August 21, 2011
Western Skillet Eggs
1/2 cup half-and-half or whole milk
Pinch of cayenne pepper
Kosher salt and black pepper
2 tablespoons extra-virgin olive oil
2 shallots, sliced
2 tsp fresh rosemary, finely chopped
2 large green bell peppers, seeded and cut into 1/2-inch strips
1 1/2 cups cherry tomatoes, halved
1/4 pound thinly sliced ham, cut into 1-inch pieces
4 slices sourdough bread, torn into pieces (about 2 cups)
2 tablespoons chopped fresh parsley, plus more for topping
8 large eggs
Position a rack in the upper third of the oven and preheat to 350 degrees. Whisk the half-and-half, cayenne, 1/2 teaspoon salt, and black pepper to taste in a small bowl.
Heat the olive oil in a large ovenproof skillet over medium-high heat. Add the shallots and cook until just softened, 1 to 2 minutes. Add the bell peppers; cook until the peppers are soft and the shallots are golden, 5 to 6 more minutes. Add the tomatoes, ham, bread, parsley and 1/4 cup water and cook until most of the liquid is absorbed, about 3 minutes. Season with salt and black pepper. Remove from the heat.
Make 8 evenly spaced indentations in the bread mixture with the bottom of a ladle or small measuring cup. Crack an egg into each indentation. Slowly pour the half-and-half mixture over the eggs. Bake, rotating the skillet a few times, until the whites are set, about 15 minutes. Top with parsley.
Assemble your ingredients.
Saute in an oven-proof skillet.
Thursday, August 18, 2011
Melinda's Annual Pumpkin Party!
Steele, Al
Directions: From Bham, take I-59 N to the Steele Exit.
At the exit, turn left. Go 1/4 mile to Hwy 11.
Turn left and go 1/4 mile to County Road 42 (Chandler Mountain Road). Turn right.
This will take you up Chandler Mountain. As you top the mountain, look for Chandler Mountain Baptist Church on your right. Take the third paved road past the church, which is Lake Road. Turn right onto Lake Road. The Smith house is the 3rd house on the left.
I hope to see you there!
Sunday, June 26, 2011
The Coconut Macaroon

I love coconut macaroons. To me, the perfect macaroon is chewy on the outside and moist on the inside. The best ones I've ever eaten were in San Francisco. Despite my ardent fondness for them, I'd never tried to make them before.
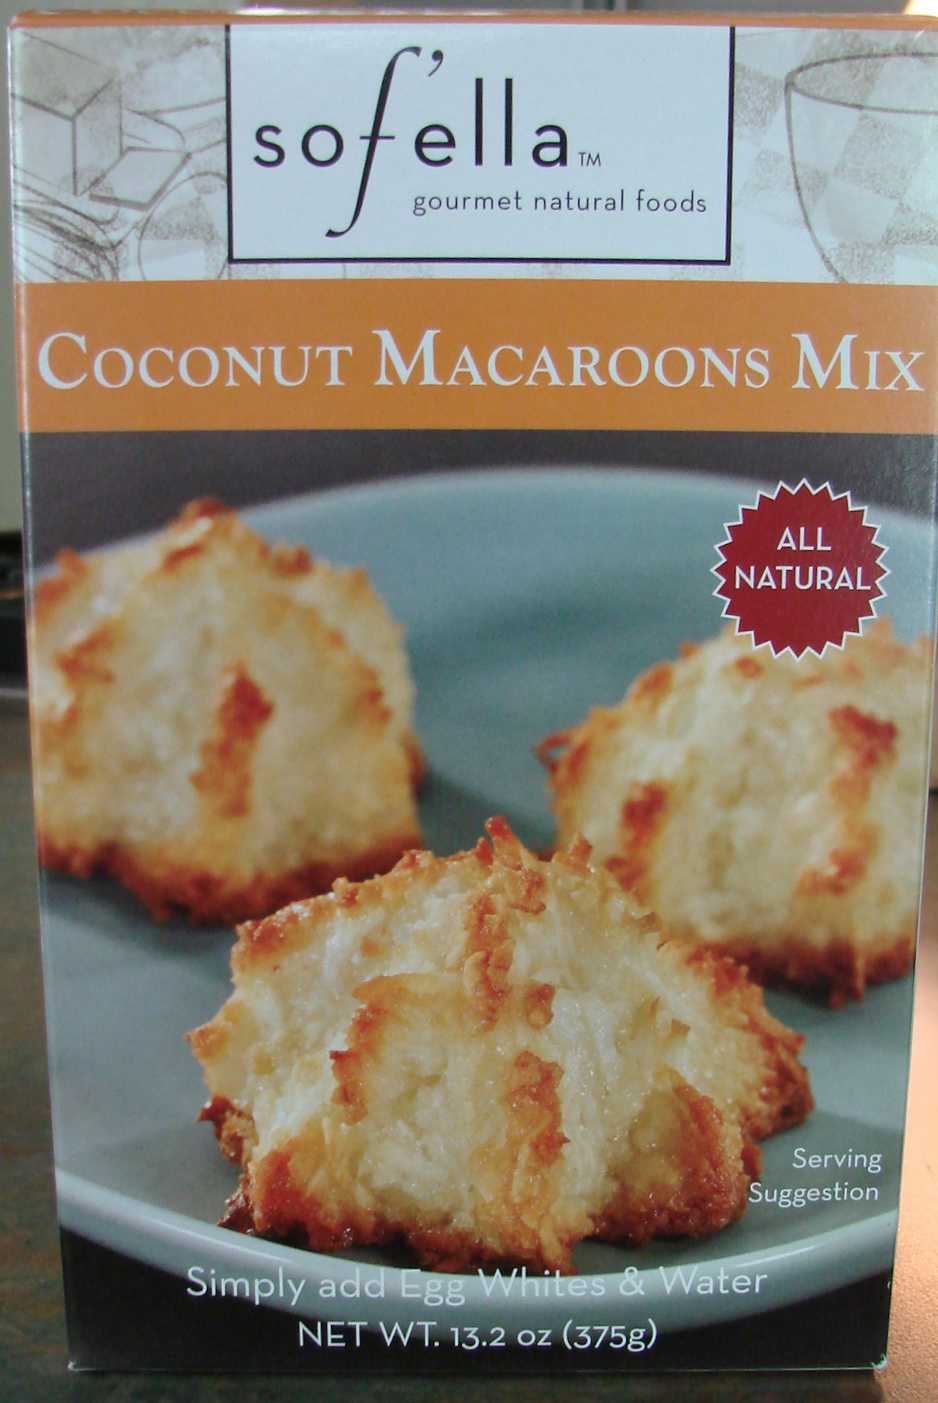
I found this coconut macaroon mix at World Market the other day. I was impressed with the fact that it was made from ALL NATURAL ingredients. You simply add water and egg whites. It couldn't be easier.
They were delicious! Moist on the inside and chewy on the outside. I highly recommend this mix if you are a fan of the macaroon.
Though I wouldn't mind a trip back to San Francisco...
Tuesday, May 24, 2011
Cheesecake in a Jar
Cheesecake in a Jar
12- half pint ball jars
1 - 1/2 cups graham cracker crumbs
2/3 cups melted butter
6 tbsp sugar
3- 8 oz. packages cream cheese softened
3- 14 oz. cans sweetened condensed milk
1 1/2 tsp vanilla
1 can cherry pie filling
Yield: 12
I used these really cute, squatty, half-pint Ball jars. I found them at Winn Dixie. You can use whatever size and shape you want.
Beat softened cream cheese and condensed milk. Add vanilla.
Subscribe to:
Posts (Atom)