I wanted to make something different for candle holders this fall, so I decided to experiment with corn husks. I got these at Walmart. One package contains enough corn husks to make several candle holders.
My other supplies included: glass containers, votive candles, raffia, and a hot glue gun. The votive candles I found are in their own individual glass holders, which I really like. I found them at Walmart as well.
The corn husks were dry and brittle, so I soaked them in water for a few minutes to make them more pliable. You can soak them in a container like this, or just use your sink.
After they have soaked for a few minutes, lay them out on layers of paper toweling:
Cover with more paper toweling and blot as much water out as you can:
Lay them out to dry. This takes several hours. I found out the hard way that they become dry and brittle again after about a week, even if you have soaked them. So I recommend using them within a couple of days of their soaking.
Protect your surface with wax paper or parchment. Apply hot glue to the pointed end of a corn husk and lay the glass container on top until it adheres.
Repeat this process and work your way around the container:
It will look like this:
If you want it to be thicker, you can add more:
Gently pull all the corn husks up and secure with wire or a pipe cleaner.
Then tie with raffia. After that, you can remove your wire. I added another piece of raffia and looped and tied it under the bow:
Then I snipped all the ends to give it a scraggly look:
This is the finished result. I used more corn husks on the left one. Just go with whatever look you like the best.
I tucked a couple of silk autumn leaves behind the raffia:
I placed two with the pumpkins on my mantel:
And one to greet our guests on my kitchen window ledge on the back porch:
This project was so much fun. I am hoping they will last from year to year. If not, I will just make more next year!
Monday, October 27, 2008
Tuesday, October 21, 2008
Chicken Pie Turnovers
I was going to make chicken pot pie tonight and I decided to change it up a little and give it an autumn theme. I made individual pastries topped with tiny autumnal decorations. The pastry I used was Pillsbury All Ready Pie Crust. I have a set of pirgoi/calzone makers which I like to use for turnovers because it makes them all so uniform in size and shape, but you could easily do these by hand as well. Just be sure to brush the edges with egg before sealing and use a fork to ensure a good seal.
This is what you will need:
3-4 chicken breasts, cooked and shredded
1 cup sour cream
1 can cream of chicken soup
1/2 cup small English peas (opt)
1/4 cup sliced, cooked carrots (opt)
salt and pepper to taste
1 box (2 crusts) Pillsbury All Ready Pie Crust
Combine filling ingredients and set aside.
On a floured surface with a floured rolling pin, roll out pie crust:
Cut crust into 4 sections:
Roll section into a ball, then roll out into a circle:
If you have a calzone maker, lay the crust on top of it:
Place the filling on top of the crust:
Close and tightly seal:
Trim edges and brush with beaten egg. Cut leaves and acorns out of leftover pastry and place on each turnover. Brush again with egg. Bake at 350 for about 20 minutes, or until golden brown.
Mmmm...comfort food.
Monday, October 20, 2008
A New Award!
I was very honored to receive the Excellent Blog award from my fellow blogger, Diva on a diet, who is the author of Beach Eats. She has a great blog with some very yummy looking recipes. Be sure and pay her a visit!
Thank you Diva!
Thank you Diva!
Friday, October 17, 2008
Autumn Leaf Cookies
I have a sugar cookie recipe that I have used for many years. Sometimes I like to use this basic recipe to create these autumn leaf cookies. They are a little time-consuming, but are really fun to make and would be a great project to do with your kids.
Autumn Leaf Cookies
1 - 1/2 cups confectioners sugar
1 cup butter, softened
1 egg
1 tsp vanilla
1/2 tsp almond extract
2 - 1/2 cups all-purpose flour
1 tsp baking soda
1 tsp cream of tartar
gel or liquid food coloring (gel gives a more intense color)
granulated sugar
1. Beat confectioners sugar, butter, egg, vanilla, and almond extract with a mixer. Add flour, baking soda, and cream of tartar. Cover and refrigerate for at least 2 hours.
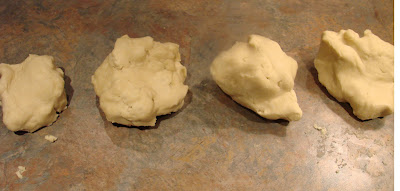
2. Divide dough into 4 balls. Color one red, one orange, one yellow, and one green. Start with a small amount of food coloring and keep kneading with each color until you achieve the shade you want. (The kneading process takes time. It will be streaky at first. And your hands will look permanently stained, but it will come off with soap and warm water. Be careful not to get it on your clothes, though). Once the color is well-blended, they will be soft again, so refrigerate again for 30 minutes to one hour.
3. After they have chilled and become firm again, combine a small amount of each color and lightly press together. (See photo below).
4. Roll out on a floured surface with a floured rolling pin. Cut into shapes. Sprinkle with granulated sugar. Re-roll as needed, but be careful not to blend too much. The more you blend, the more it becomes all one color.
5. Sprinkle with granulated sugar.
6. Place on a greased cookie sheet and bake at 375 for 7-8 minutes.
Divide the cookie dough into four balls:
Color each a different color, then chill.
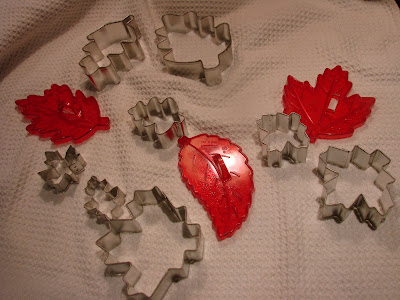
Any size or shape of leaf cookie cutter will be fine. I used a variety of them.
Take a small amount from each ball of colored dough and combine like this. Lightly press together:
Roll out onto a floured surface with a floured rolling pin. Cut into shapes, enclosing the colors you like within the cookie cutter. Use leftover dough to make more cookies. Keep chilling it as needed to keep it firm enough for the cookie cutters.
Place on a greased cookie sheet and bake at 375 for 7-8 minutes:
Place on a cooling rack:
As I mentioned before, the more you work the dough, the less defined the colors become. In the photo below, I chose a baked cookie from each stage of mixing the dough, the first one being from my first batch, then each one progressively after my dough scraps were mixed together again. Notice how the one on the far right is almost solid orange. I have had a fear of over mixing my dough ever since my Play Doh days. Remember how gross it looked after all the colors were all globbed together? At least this is prettier than that, and it tastes better, too. No I did not eat Play Doh. Well, not much.
These would be great given in cellophane bags tied with a ribbon for teacher gifts and would also be good for a fall party.
They have an old fashioned sugar cookie flavor. I hope you try them!!!
Monday, October 13, 2008
Owl Cupcakes
I found this cute recipe in the 2007 edition of Land O' Lakes Harvest Baking. I used a chocolate cake mix, but you can bake the cupcakes in any flavor, and from scratch, if desired. I added 1/2 cup semi sweet chocolate morsels to the cake mix to add a little more chocolate flavor. I am not a fan of canned frosting, so I made homemade butter cream using a recipe from one of my old Betty Crocker cookbooks. It is a simple, wonderful frosting recipe, and I am including it in this post.
I was so engrossed in making these that I did not do many step-by-step photos, but you should be able to figure out the assembly from the above photo. I used Ghirardelli Milk Chocolate morsels for the eyes because they are a little larger than the semi-sweet, but you can use either one. I experimented with how to attach the morsels to the life savers and decided that Betty Crocker Cookie Icing works the best. I used it on the owls in the bottom of the above photo, so you can see the difference. It takes a few minutes to set, so don't get in a hurry.
Owl Cupcakes
1 pkg cake mix (I used Duncan Heinz Moist Deluxe Dark Chocolate Fudge)
1/2 cup semi-sweet chocolate morsels
oil, water, and eggs, according to package directions
24 cupcake liners
Butter Rum Life Savers
Betty Crocker White Cookie Icing
Ghirardelli Milk Chocolate morsels (if desired, for eyes)
sliced almonds
whole cashews
Bake cupcakes according to package directions. Add chocolate morsels if desired. Cool.
Prepare frosting and frost the cupcakes. Place 2 butter rum life savers just above halfway on each cupcake for the eyes. Place a dot of cookie icing on each life saver. Place a chocolate morsel on top of the icing. Arrange sliced almonds around the eyes for feathers. Add a cashew for the beak.
Frosting:1/3 cup softened butter
3 cups confectioners sugar
3 tbsp milk
1-1/2 tsp vanilla
Beat ingredients until smooth. Add a little more milk, if necessary to achieve the desired spreading consistency.
Bake cupcakes according to package directions:
Frost and decorate:
These would be great for a kid's party. Or a ladies' spend-the-night party, which is what I took them to. I hope you have fun with these!
Tuesday, October 07, 2008
Mini Reuben Sandwiches
This sandwich recipe uses biscuit dough instead of bread and it makes a neat little sandwich which is great anytime. It is really good to pack in a lunch box. They are great served with mustard and a pickle.
Mini Reuben Sandwiches
2 cans Pillsbury Grands Golden Homestyle Buttermilk biscuits (total of 20 biscuits)
1/2 lb corned beef, sliced
1 can sauerkraut (you will not use the whole can)
sliced or shredded cheese (I used Swiss)
1 egg, beaten
poppy seeds
1. On a floured surface, roll out each round of biscuit dough.
2. Top half of them with corned beef, folded into quarters, then sauerkraut, then cheese.
3. Brush edges with egg and top each with another biscuit.
4. Seal edges with a fork and brush with beaten egg. Sprinkle with poppy seeds.
5. Bake at 400 for 15- 20 minutes or until golden brown.
Roll out each biscuit round on a floured surface:
Top with corned beef and sauerkraut:
Then top with cheese and brush edges with egg:
Place a biscuit on top of each one and seal with a fork. Brush with egg and sprinkle with poppy seeds. Bake at 400 for 15-20 minutes...
...or until golden brown:
This sandwich could also be made with other fillings.
Sunday, October 05, 2008
The Pumpkin Patch Party
This post is about a wonderful annual event that takes place in October, hosted by Melinda Smith in Steele, Alabama. Melinda grows the most beautiful pumpkins I have ever seen. And one day out of the year she holds a pumpkin patch party where people are given the opportunity to come and buy some of her bountiful harvest.
The event was yesterday, and my cousin, Connie, and my Aunt Peggy and I went together. We needed some girl time!
Melinda has a wrap around porch which was covered with pumpkins of all shapes and sizes.
She had small pumpkins in buckets.
She has a great house which is set on a breathtaking piece of property.
Underneath this arbor was a large array of delicious salads and desserts made by several talented cooks.
Each table was decorated creatively, and was loaded down with food. (I didn't get my camera out until almost the end of the party. I apologize for that!)
What a unique idea for small pumpkins!
There were tables set with burlap tablecloths and flowers in pumpkin vases.
She provided "sold" signs to place with the pumpkins you claimed. Her prices were very reasonable. I hope I can come close to doing justice in arranging these gorgeous pumpkins once I get them home.
Friendly and professional cashiers and pumpkin handlers were waiting for you once you finished your selections.
Even though Melinda has been hosting this party for several years, this was my first opportunity to be able to go. We had so much fun. I was able to see lots of good friends. My only regret was that I have to wait another year to go back.
Next year I will post about the party in advance so that those of you who live locally will have an opportunity to go!
Subscribe to:
Posts (Atom)