Friday, April 20, 2007

Happy Birthday Amby

Twenty-five years ago today, Amby was born. She weighed 7 pounds and 1 ounce.

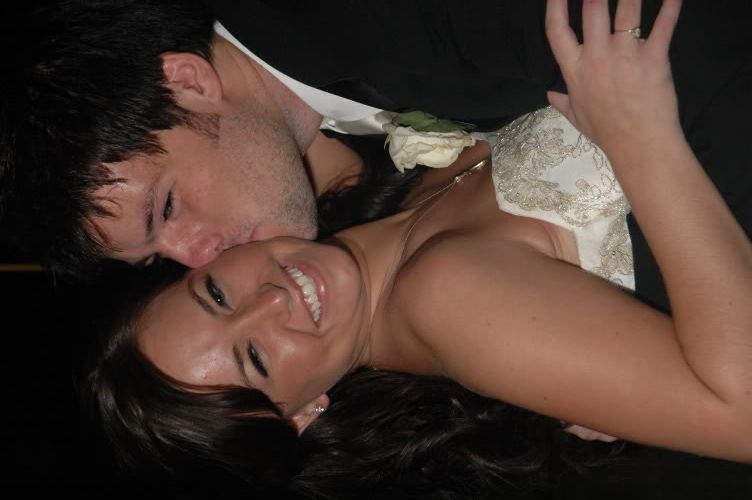
She had lots of black hair. The nurses at the hospital kept slicking her hair down, so I took her into the bathroom, washed her hair in the sink, and let it be natural. Then I took this picture of her in my hospital bed:

She enjoyed swimming from a very early age:


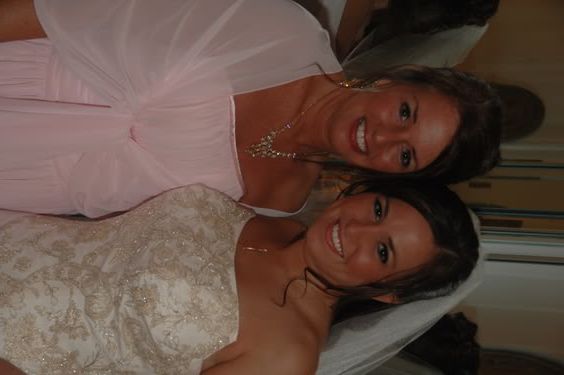
She and her brother Zac have always been very best friends:

She is very artistic and creative. Many people do not know this, but she invented the colors plime, plint, and rosemotique.

Just really cute...

...and really fun. We both find humor in odd things, sometimes to the point of hysterical laughter, and have had unusually funny things happen to us. Sometimes people think we are weird. Maybe it's genetic.

One day, a very important person came into her life who would become the standard that no other person she dated could ever measure up to. That was Nathan.

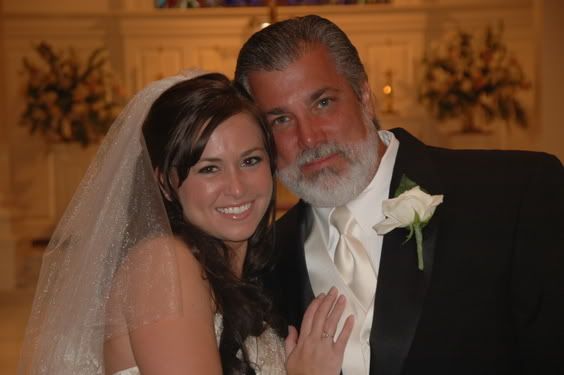
She and Nathan were married in September of 2005. Photo Sharing and Video Hosting at Photobucket


A bittersweet time for her dad...

Photo Sharing and Video Hosting at Photobucket


her brother....


Photo Sharing and Video Hosting at Photobucket
...and for me.
Photo Sharing and Video Hosting at Photobucket


I love being around her and I have so enjoyed watching her grow up to be the amazing person that she is.

Happy Birthday Amby.

Monday, April 16, 2007

Salmon en Papillote


The term, "en papillote" (pronounced: pap-uh-loht or pa-pee-yawt), simply means "in a paper wrapper". The paper wrapper is made of parchment which is cut into a heart-shape and folded around the ingredients. This creates its own steamy chamber which allows all the flavors to infuse while the salmon cooks. It is very easy to do and it makes a great presentation for company. The vegetables are blanched ahead of time because the actual baking time for the salmon is short. This can be done with other types of seafood or fish, and can include other vegetables, also.

Salmon en Papillote

1 cup fresh green beans
2 salmon fillets
dillweed
salt & pepper to taste
1/2 cup butter
1 tsp vanilla
fresh lemon slices

Steam green beans until crisp-tender. Cut a piece of parchment about 22" long. Fold in half. While folded, cut into a 1/2 heart shape. (Illustration to follow). Open and spray heart with cooking spray. Place each fillet onto the right half of the heart. Sprinkle salmon with salt, pepper, and dill. Melt butter and combine with vanilla. Pour over top of the fillet. Top with lemon slices, too, if desired. Fold heart in half again. Starting at one end, make small folds aroungd the edges of the paper until you work your way around it. Place in a baking dish and bake at 375 for about 20 minutes, or until salmon flakes in the center. Cut the top open and serve.

Steam green beans until crisp-tender. Trim ends and cut into small pieces:


Fold parchment paper in half:


Cut into a half-heart shape:


Open the heart and spray with cooking spray. Place ingredients on the right half of the parchment heart:


Begin to fold the edges all the way around.
This will take folding over several times until it stays folded.


Continue folding all the way around. It will look like this:


Bake and enjoy!

Thursday, April 12, 2007

Squash Casserole

Summer squash is high in manganese and vitamin C, and a good source of many other nutrients, including vitamin A, magnesium, riboflavin, and folate. It is naturally high in fiber and low in calories, fat, and sodium. This is an unusually good version of squash casserole. The recipe, which I altered slightly, was given to me by a friend many years ago. It takes a little prep time, so be sure to plan ahead.

Squash Casserole

1-1/2 pounds yellow squash, sliced and boiled until crisp-tender
3 tbsp butter
1/4 cup chopped green onion
1/2 cup chopped celery
1/2 cup chopped bell pepper
1/4 cup chopped banana pepper
1 can sliced water chestnuts
1 cup sour cream
1 egg
1 cup shredded cheddar cheese
salt & pepper to taste
1 sleeve ritz crackers, crumbled into fine crumbs

Drain squash well in a colander. Saute onion, peppers, and celery in butter until tender. Add all other ingredients and mix well. (Note: It takes alot of salt, at least for me it does.) Pour into a greased 13x9 inch baking dish. Top with cracker crumbs. Bake at 350 for 30 minutes or until golden brown.

Boil squash until crisp-tender:


Saute onion and peppers until tender:


Bake until it is golden brown:
I think the banana peppers and the water chestnuts are what make this recipe so good.

Saturday, April 07, 2007

Homemade Rolls with a Twist

When I make homemade yeast rolls and have a little extra time, I like to braid the dough before I bake them. They not only look more special, they actually seem to taste better. For those of you who do not have a bread machine, I recommend that you get one. There are many possibilities for uses for this dough recipe, such as rolls, loaves, cinnamon rolls, cheese danish, pepperoni bread, homemade pizza, and garlic breadsticks. The list is endless.

This is my basic roll dough recipe with the addition of sharp cheddar cheese.

Cheese Rolls

4 cups all-purpose flour
1 tsp salt
6 tbsp sugar
1 stick butter, sliced into about 6 pieces
1 cup water
1 egg
2 pkg rapid rise yeast
2 cups grated sharp cheddar cheese

Combine ingredients and process in bread machine on dough setting. After first rise, remove dough and divide into 16 portions. Divide each of the 16 portions into 3 portions. Roll each into a rope. Pinch the top ends together and braid. Then pinch the bottom ends together and pull pinched ends to the back. Place on greased cookie sheet. Brush with egg wash (one beaten egg mixed with about 2 tsp water). Bake at 350 for 12-15 minutes.

Divide dough into 16 equal portions:


Divide each portion into 3 balls:

Roll them out and pinch them together at the top:


Begin braiding from the top down and pinch the bottom ends together. Then tuck the ends under the roll and place on the pan.


After you have shaped and placed the rolls, brush with egg wash mixture. Allow to rise in a warm place with no drafts for about an hour.

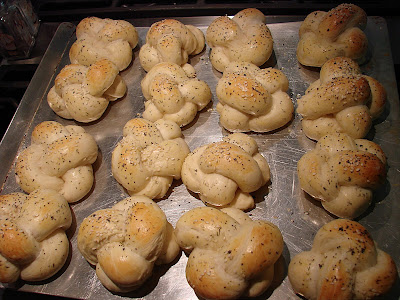
This is how they look finished: For the cheese rolls, I sometimes like to brush them with melted butter and sprinkle a generous amount of parmesan cheese on top.
I made another batch without cheese, so I added a couple of teaspons of dill to the egg wash and brushed it on. Then I sprinkled poppy seeds and sesame seeds on top.


These rolls are a great way to use your creativity and try something new, and they are a perfect accompaniment for most any meal.

Thursday, April 05, 2007

Uncommon Spring Tablescape

We have several azalea bushes that are presently in full bloom, so I decided to take advantage of that and use them for a spring tablescape. I wanted to use clay pots instead of vases, so I pulled out some old ones and decided to paint them. It turned out to be a great project.
Items needed:
flowering stems in varying lengths
clay pots (old or new)
oasis
acrylic paint
disposable sponge brushes
moss (Michaels or Hobby Lobby)

I started out by painting the pots. I diluted the acrylic paint with water, making it somewhat translucent. I started with a green and wiped it down with a damp cloth. I repeated that same process with white, and then ended with brown. It gave the pots a funky look. You could use whatever color you want. If you don't like your result, simply wipe it off and start over.
This is how they turned out: I soaked the oasis in water for a few minutes:

The oasis easily slices with a knife to fit into the pots. I used a large piece in the middle and small pieces on the sides for stability:

I combined the stems I had into groupings according to color. I pushed the stems into the oasis, then covered the oasis with the moss.
The flowers in the middle pot (pictured below) had particularly long stems, so I pulled off the leaves and tied them with a ribbon, giving it the look of a topiary.

This is an easy and inexpensive way to create a very colorful tablescape.
Note: Azaleas wilt a little after 24 hours, so if you use them, put it together the day of your event.

Monday, April 02, 2007

Fettuccine Alfredo with Grilled Chicken

This recipe comes from Betty Crocker's International Cookbook. I have made it many times and the alfredo sauce rivals any I have ever had in a restaurant. I like to use fresh fettuccine, which takes only about 3 minutes to cook. The sauce comes together quickly, too. For us, I doubled the sauce and used 1-1/2 packages of pasta, but still used just four chicken breasts. Doubled, it serves 8.


Fettuccine Alfredo with Grilled Chicken

3-4 chicken breasts
Newman's Own Oil & Vinegar Dressing
8 oz fettuccine, uncooked
1 stick butter
1/2 cup whipping cream
3/4 cup grated parmesan cheese
1/2 tsp salt
dash of pepper

Sprinkle chicken with salt and pepper and marinate for about an hour in Newman's Dressing. Grill chicken and slice.
In a medium pot, bring water to boil with about 2 tsp olive oil and cook fettuccine until done, 3-4 minutes, if fresh. Drain or remove with a pasta spoon.
Meanwhile, heat butter and cream over low heat until butter is melted. Stir in cheese, salt, and pepper. Keep on low heat until pasta is ready.
Place chicken on noodles and pour sauce over it.

The sauce is ready in about 3 minutes:

Cook the pasta al dente:

Gil grilled the chicken for me and it was perfect:

I found this kalamata olive boule at Western in Mt Brook. It originally came from Edgar's Bakery. Finding it is what inspired me to make this meal and it went with it beautifully.

Yes, it is high in calories. No, it is not the way we eat every night. We eat healthy most of the time. But it's ok to splurge every once in a while. I promise that the flavor of this sauce is worth every calorie.