Saturday, November 06, 2010

A Facelft for a Built In Bookcase

This is a project we did back in May of this year. We have a built-in bookcase in our guest room  in dire need of a redo. In anticipation of my grandson, Roman, I decided to cheer it up with some fabric and add some of Amby and Zac's favorite children's books. This is the before picture. It was a little tired.

Gil helped me take out the shelves.

The room is an apricot with turquoise accents so I chose a fabric that would coordinate with that. I found this fabric at Joann's.

I ironed on a fusible web to the fabric to give it body. Then I trimmed it to fit. Gil applied spray adhesive the the back of the bookcase and we attached the fabric.

I added a coordinating piece of fabric to the top and bottom to hide my raw edges and add a little interest. This is the top:

And the bottom:


It added some fun and brightness to the room.


I filled it with treasures.


I made these blocks for Roman (obviously). My next post will show how I did it.

The back sides of the blocks spell his middle name.

The books are a mix of Amby and Zac's, and also some of mine.

Gil bought this mama and baby raccoon for me when I had Amby. They were waiting for us at the house when we came home from the hospital with a sign that said, "Welcome home Vickie and Amby." I still have the sign, too.....sigh.

I painted the lids of two Ball jars and filled them with marbles to use as bookends. It took me a while to find marbles, but I finally found them at Homewood Toy and Hobby. It seemed like marbles were everywhere until I actually started looking for them.

This is the Cheshire Cat from Alice in Wonderland. I bought it for my Dad when I was in Disneyworld in 1973. The smile on his face reminded me of him. He loved it and always kept it on his desk. Needless to say, it is very special to me.

These books were a series that my mom ordered for me. I got a new one in the mail every month.

This is a three-car grouping of a wooden train Gil had when he was little. He still has the rest of it and I'm sure it will get lots of play time soon. The train is sitting on top of a set of Highlights magazines  which belonged to my brother and me. The sock monkey is there just because he is cute and I love sock monkeys.


I found this adorable mouse at A'mano in Mountin Brook. His matchbox bed reminded me of Tom and Jerry cartoons, and books like The Borrowers, where the characters used found items to repurpose into useful furniture for themselves. I love him and I named him Maddox. I know Roman will enjoy playing with him.

I actually have more adventurous plans for this bookcase which involve an entire apartment for Maddox. More to come.

Wednesday, October 27, 2010

A Country Fair

Gil and I attended a Country Fair sponsored by Country Living magazine last weekend in Stone Mountain, Georgia. The weather was absolutely gorgeous and Stone Mountain was the perfect setting.

It was really exciting for me to read about the fair in the magazine months in advance, and then actually get to go. It was just too close to home for us to pass up.


I loved this cool pumpkin arrangement. I think I will toss one together this weekend.

I got to attend cooking classes that were held in this tent:

My favorite speaker was Gena Knox. She is the author of Gourmet Made Simple and Southern My Way. She also has a blog which can be found here. She prepared two dishes, Onion Jam-Topped Crostini with Bacon and Cheddar Cheese, and Spaghetti Squash with Rosemary and Parmesan. She prepared each dish step by step and we got to taste them when she finished. Both were scrumptious and I plan to make them again.

There were countless craft booths which were nestled on a winding path. I didn't get many pictures, but here are a couple. These chairs were interesting. Not like your mama's wing backs.

And everyone needs one of these, whatever it is. It is only mildly disturbing.

We also attended a home makeover workshop hosted by Chip Wade, of HGTV's Curb Appeal. It was really interesting.


We had been to Stone Mountain before, so we decided to mostly concentrate on the fair for the day, but we did drive up to look at it for a few minutes before we headed home. It is pretty amazing. I researched it and found out that it is is a quartz monzonite dome monadnock. In other words, a giant rock.


The highest point is 1,686 feet The mountain is more than five miles in circumference at its base. There is a single trail up one side. We have walked it before and it is a major workout. There is also the optional skyride.


There is an impressive carving on the side of the mountain. Here is an old picture of some of the carvers at work. I like how the work required a coat, tie, and hat. They began work on the carving in 1926, but, for many reasons, it was not officially complete until 1972.


Here it is today. This is Stonewall Jackson, Robert E Lee, and Jefferson Davis. The carved area measures three acres, or about the size of three football fields. Pretty amazing.


It was a really nice place to spend a fall day.

There are fun things to do there. This is called The Sky Hike. I want to try it next time.
The shops around it are quaint and cozy. The candy shop makes pretty good fudge. Maybe the next best thing to homemade.


It was a fun day in a beautiful setting. Country Living holds fairs all over the country at different times of the year. I highly recommend going to one.

Tuesday, September 21, 2010

Vanilla Cupcakes with Buttercream Frosting

Sometimes a really delicious recipe doesn't have to be made totally from scratch. These cupcakes are a perfect example. It's hard to beat the Duncan Hines Butter Recipe Cake Mix. It is light, or should I say "light," and moist. The frosting is my version of a simple buttercream, and I love it so much that I believe it even trumps chocolate. The combination of the two makes a really fabulous cupcake.

Vanilla Cupcakes with Buttercream Frosting

1 box Duncan Hines Butter Recipe Cake Mix
1 tsp vanilla

Prepare cake according to package directions with the addition of the vanilla. Spoon into a muffin tin lined with cupcake cups and bake at 375° for 15 minutes. Cool and frost with buttercream frosting. Yield: 22-24 cupcakes


Buttercream Frosting

2 sticks butter, softened at room temperature
1 lb confectioners sugar
5 tbsp heavy cream (milk or 1/2 & 1/2 are fine)

Beat butter at high speed until light and fluffy. Add sugar, vanilla, and cream and continue beating until desired consistency. Add more cream or sugar if needed.

Mix cake according to package directions, with the addition of a little extra vanilla.

Spoon into paper liners and bake at 375° for 15 minutes.

They will be a light golden brown on top:

The frosting will look a little dry until you add the milk.

I like to pipe the frosting onto the cupcake, but you can spread it with a knife if you want to. Be careful not to be too generous with the piping or you might run out of frosting. For me it makes JUST enough.

I also like to use Wilton White Sparkling Sugar Sprinkles on top for a little bit of sparkle. You can double click on this photo to see it better.

I made these cupcakes for some dear friends of mine who came over for dinner the other night. I wanted to send them home with one as well. I found these cute individual cupcake boxes (again by Wilton) at the Hob Lob.

I apparently love the combination of pink and green because I already had plenty of ribbon to choose from.

They come with inserts that stabilize the cupcake and keep it from touching the sides. Cool idea.

Tie it up with a little bit of ribbon and you have a great party favor.


I suggest having the cake mix and some of these boxes on hand so you can be ready to give a special little gift at the spur of any moment.

Saturday, June 26, 2010

A Personalized Hostess Gift

Plants make great hostess gifts, but they can sometimes be pretty ordinary. With just a small amount of effort you can add pizazz to your plants!

First, start with a cool pot. I got this one at at Anthropologie. If you aren't lucky enough to have an Anthropologie where you live, it is available online. Its description reads, "rough-hewn terracotta, worn and weathered as if it's spent a dozen seasons braving the elements, yearns for a sunny indoor perch to cradle fresh herbs and aromatics." Whatever. I just think it's a cool pot.

A great place here in Birmingham to buy plants is Leaf 'n Petal. I bought this maidenhair fern there. It is beautiful and delicate. I added some wild moss from our yard to the top of the soil. You can see it more closely if you click on the picture.

I used my chalk ink markers for the gift tag. They are available online and at Michael's. I would recommend the primary colors over these earthy ones because there are several colors here that don't show up on black.

I found this tiny chalk board gift tag at World Market. Isn't it cute? I love tiny versions of things. I used a small piece of wood inside to hang it onto. A popsicle stick would do. A cute bow completes it.

Friday, June 18, 2010

Create Your Own Baby Blankets


I noticed one of the babies in the nursery at work was wrapped in a cotton gauze blanket which I thought was a really great idea. I looked up the website and thought they were pretty pricey (1 for $19.99, 4 for $44). So I decided to make my own and made them for about $7 each. Watch for sales at Joann and Hancock and pay even less. The gauze is great for summer.

I made these blankets about 45" square, which for 45" fabric, each blanket required 1 - 1/4 yards.
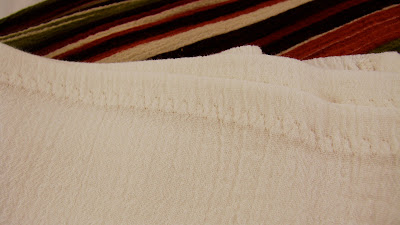
I folded over a 1/2" hem on all 4 sides and pressed. Then I folded over another 1/2" and pressed again. A hot steam iron really helps.


My machine does a lot of fun stitches, which I used on my blankets, but just a straight or zigzag stitch would be fine. I made some flannel blankets, too.


I found this cute alphabet print at Hancock. I love cute little animal faces.

I layered it with batting and backed it with muslin.

I machine quilted around each square.

I think there were 64 squares, but it really didn't take all that long.

It turned out to be really soft and cute.

I loved making these blankets. It is a great way to do a special baby gift. Especially for your baby's baby. : )