Showing posts with label autumn. Show all posts

Tuesday, October 27, 2009

Autumn Leaf Fudge

This is a festive twist you can take on your favorite fudge recipe with the use of cookie cutters. My all time favorite is Fantasy Fudge. It is smooth, creamy, and full of chocolate goodness. It is a classic recipe and is on the back of the Kraft Marshmallow Cream jar if you should ever need it. I did a similar recipe to this for Christmas last year, which is great to do if you want to include the cookie cutter as a gift with the fudge.

Cutout Fantasy Fudge

3 cups sugar
3/4 cup margarine
1 can (5 oz.) evaporated milk
1 pkg. (12 oz.) semisweet chocolate pieces (I recommend Ghirardelli)
1 jar (7 oz.) marshmallow creme
1 cup chopped nuts
1 tsp. vanilla

Combine sugar, margarine and milk in heavy 2 to 3-quart saucepan. Bring to a full rolling boil, stirring constantly. Continue boiling 5 minutes over medium heat or until candy thermometer reaches 234° F., stirring constantly to prevent scorching. Remove from heat.

Stir in chocolate pieces until melted. Add marshmallow creme, nuts and vanilla. Beat until well blended. Pour into a greased 13-by-9-inch pan. Cool at room temperature. Remove the fudge from the pan, foil included. Cut into shapes with cookie cutters.

Line a baking pan with foil and then spray it with Pam. I used a 13 x 9 pan.

Make fudge according to the recipe. Bring to a rolling boil.

Make sure your candy thermometer reads 234°.

Add remaining ingredients:

Pour out onto foil and cool. Remove fudge and foil from the pan and cut with cookie cutters.

Chill until ready to serve.

Wish there were some left. I would have a piece right now.

Wednesday, October 21, 2009

Candy Jar Pumpkin People

This is a very cute idea I got from Martha Stewart. It would be a fun project for children, too. Here is the picture from her website:


They are funny and festive, but some seem lackluster in character and personality. The two on the right look a little on the manic side. So, I decided to do my own twist on the pumpkin people.

Materials Needed:

1 jar
Halloween candy
1 tiny pumpkin
googly eyes
ribbon
small piece of candy (for nose)
doll hair
tiny, bendy twig (for mouth)
white glue (I prefer Alene's tacky glue)

Fill the jar with the candy. Glue eyes and nose on the pumpkin. Add the mouth and bend to smile, if desired. Glue strands of hair onto the top until desired coiffure achieved.


And...voila! A really cute pumpkin person. I decided to give him an understated Mona Lisa smile.

He is going to sit on my windowsill to bring me cheer while I wash dishes.

Friday, October 17, 2008

Autumn Leaf Cookies

I have a sugar cookie recipe that I have used for many years. Sometimes I like to use this basic recipe to create these autumn leaf cookies. They are a little time-consuming, but are really fun to make and would be a great project to do with your kids.

Autumn Leaf Cookies

1 - 1/2 cups confectioners sugar
1 cup butter, softened
1 egg
1 tsp vanilla
1/2 tsp almond extract
2 - 1/2 cups all-purpose flour
1 tsp baking soda
1 tsp cream of tartar
gel or liquid food coloring (gel gives a more intense color)
granulated sugar

1. Beat confectioners sugar, butter, egg, vanilla, and almond extract with a mixer. Add flour, baking soda, and cream of tartar. Cover and refrigerate for at least 2 hours.

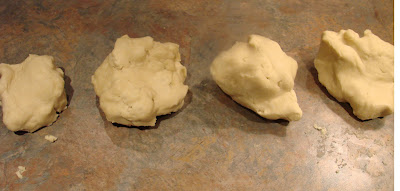
2. Divide dough into 4 balls. Color one red, one orange, one yellow, and one green. Start with a small amount of food coloring and keep kneading with each color until you achieve the shade you want. (The kneading process takes time. It will be streaky at first. And your hands will look permanently stained, but it will come off with soap and warm water. Be careful not to get it on your clothes, though). Once the color is well-blended, they will be soft again, so refrigerate again for 30 minutes to one hour.

3. After they have chilled and become firm again, combine a small amount of each color and lightly press together. (See photo below).

4. Roll out on a floured surface with a floured rolling pin. Cut into shapes. Sprinkle with granulated sugar. Re-roll as needed, but be careful not to blend too much. The more you blend, the more it becomes all one color.

5. Sprinkle with granulated sugar.

6. Place on a greased cookie sheet and bake at 375 for 7-8 minutes.


Divide the cookie dough into four balls:

Color each a different color, then chill.

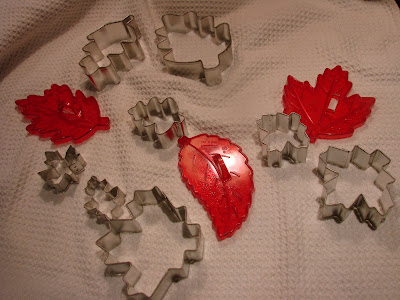
Any size or shape of leaf cookie cutter will be fine. I used a variety of them.

Take a small amount from each ball of colored dough and combine like this. Lightly press together:

Roll out onto a floured surface with a floured rolling pin. Cut into shapes, enclosing the colors you like within the cookie cutter. Use leftover dough to make more cookies. Keep chilling it as needed to keep it firm enough for the cookie cutters.

Place on a greased cookie sheet and bake at 375 for 7-8 minutes:


Place on a cooling rack:

As I mentioned before, the more you work the dough, the less defined the colors become. In the photo below, I chose a baked cookie from each stage of mixing the dough, the first one being from my first batch, then each one progressively after my dough scraps were mixed together again. Notice how the one on the far right is almost solid orange. I have had a fear of over mixing my dough ever since my Play Doh days. Remember how gross it looked after all the colors were all globbed together? At least this is prettier than that, and it tastes better, too. No I did not eat Play Doh. Well, not much.


These would be great given in cellophane bags tied with a ribbon for teacher gifts and would also be good for a fall party.

They have an old fashioned sugar cookie flavor. I hope you try them!!!