Showing posts with label baby gifts. Show all posts

Tuesday, December 07, 2010

Diaper Burp Cloths


This is a fun and easy way to make really cute burp cloths out of cloth diapers. I found this adorable idea at Chickpea Sewing Studio. All you need are cloth diapers and scraps of cute fabric. If you want to buy new fabric just for the burp cloths, 1/4 yd is more than enough to make two of them.

Wash the diapers and then press out nice and flat with a steamy iron:

I really don't measure. I cut the fabric strips wide enough to turn down a nice edge on the sides and the ends. Then I press it down.

Pin and sew around all the edges. I used a simple zigzag stitch for these, but you can use something more decorative if you want to.


This cute way to present the burp cloths also came from Chickpea Sewing Studio.


And for a related craft, the burp cloths I made for Amby went into this basket (from Michael's), along with other gifts I had for her. I made the tag from scrapbook paper. You can buy the baby alphabet beads at Michael's, too.


These burp cloths are really fun to make and are great to go along with another gift, or just by themselves.

Monday, November 08, 2010

Personalized Baby Blocks


This is a fun project that would be perfect for a baby gift or shower decoration. It is a little time-consuming, but if you are like me, you enjoy the process as much as the result.

Supplies Needed:

unfinished wooden baby blocks
unfinished wooden letters
acrylic paint
paintbrushes in various sizes
scrapbook paper
glue

I was in a little bit of a hurry when I made these and didn't take enough photos. Sorry. My first step was to paint the 2 sides of the block where the letters were going, which become the front and back. Then I painted the letters in a contrasting color. You will be able to see that at the end.

Using the block as a template, I traced around it onto the area of paper I wanted to highlight.


I used the paper on 4 sides of each block. I attached it to the unpainted sides.

I applied Alene's Tacky Glue to the paper and adhered it to the block.

I trimmed all overhang with a scissor.

Then I glued on the letters. I applied Mod Podge in a matte finish and over sanded, but neither of these steps is necessary.

These are for my grandson, whose first and middle names happen to be the same length. That's because he has cool parents.

Right now, they are on the bookcase in "his" room at my house.

Friday, June 18, 2010

Create Your Own Baby Blankets


I noticed one of the babies in the nursery at work was wrapped in a cotton gauze blanket which I thought was a really great idea. I looked up the website and thought they were pretty pricey (1 for $19.99, 4 for $44). So I decided to make my own and made them for about $7 each. Watch for sales at Joann and Hancock and pay even less. The gauze is great for summer.

I made these blankets about 45" square, which for 45" fabric, each blanket required 1 - 1/4 yards.
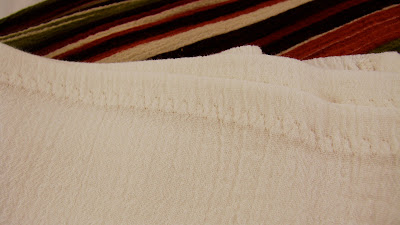
I folded over a 1/2" hem on all 4 sides and pressed. Then I folded over another 1/2" and pressed again. A hot steam iron really helps.


My machine does a lot of fun stitches, which I used on my blankets, but just a straight or zigzag stitch would be fine. I made some flannel blankets, too.


I found this cute alphabet print at Hancock. I love cute little animal faces.

I layered it with batting and backed it with muslin.

I machine quilted around each square.

I think there were 64 squares, but it really didn't take all that long.

It turned out to be really soft and cute.

I loved making these blankets. It is a great way to do a special baby gift. Especially for your baby's baby. : )

Tuesday, June 01, 2010

Tie Dye, Part Two: Onesies

This is my second installment of my tie dye adventures. I was inspired by the anticipated arrival of my grandson to try a onesies project. Please refer to my first post for any basic instruction, such as types of dye, etc.

I bought onesies at Walmart and prewashed them. I dampened them with water before I dyed them. For this one, I did the spiral technique. Place a fork at the center of where you want the spiral and begin to twist it.

Continue twisting...

Once you have twisted it into a circle, add rubber bands and apply dye to the front and back of each section. I used orange, yellow, lime green, and brown.


This is how it turned out.
After I finished each one, I wrapped it in plastic wrap and let it sit for several hours. I understand that there is a microwave technique that will set the heat but I haven't tried that yet.

You can also section it off like this:


I did several solid ones. They still had a mottled, hand-dyed look, which I liked.

I placed the rubber bands on the middle of this one. I don't have the pictures of it, but I dyed the onesie a turquoise color and the sectioned-off part a denim blue.

I made a pair of white knit pull-on pants and dyed them a solid denim blue to match the onesie.

And this is the outfit. The pants looked stonewashed.

I hope this helps to give you some fun ideas for tie dyeing onesies. It is a fun and inexpensive project and it makes a great gift. I will be posting a lot more fabric dyeing ideas soon!

Saturday, September 05, 2009

Good Things Come in Personalized Packages

My niece, Kellie is having a baby at the end of October and I wanted to buy a gift for her baby shower. I really like to give people gifts in containers they can reuse, so I bought several small items on her registry and grouped them together in a basket. I have posted similar gifts to this before, using the same wrapping technique, but this one is a little more personal.

I grouped everything in the basket with some shredded paper:

I laid the basket on a baby blanket:

Then I folded the sides first and secured them with a diaper pin:

It helps to keep the corners really neat while you are folding:


I folded up the bottom half:

Then folded down the top half:

What makes this gift different from the gifts in my other posts is the card. I just so happened to have had an adorable picture of her when she was a little girl. I cropped it, gave it a sepia finish, and reprinted it on photo paper. Then I added photo corners to it and attached it to some textured red card stock. I spelled her name with baby alphabet beads and glued them to the card:

I glued a strip of the card stock to the back:

So that I could run the ribbon through it in order to attach it to the gift:

The final touch was a diaper pin on the top:

It is really so much fun to take a little bit more time and personalize your gifts.