Navigation menu

Saturday, June 26, 2010

A Personalized Hostess Gift

Plants make great hostess gifts, but they can sometimes be pretty ordinary. With just a small amount of effort you can add pizazz to your plants!

First, start with a cool pot. I got this one at at Anthropologie. If you aren't lucky enough to have an Anthropologie where you live, it is available online. Its description reads, "rough-hewn terracotta, worn and weathered as if it's spent a dozen seasons braving the elements, yearns for a sunny indoor perch to cradle fresh herbs and aromatics." Whatever. I just think it's a cool pot.

A great place here in Birmingham to buy plants is Leaf 'n Petal. I bought this maidenhair fern there. It is beautiful and delicate. I added some wild moss from our yard to the top of the soil. You can see it more closely if you click on the picture.

I used my chalk ink markers for the gift tag. They are available online and at Michael's. I would recommend the primary colors over these earthy ones because there are several colors here that don't show up on black.

I found this tiny chalk board gift tag at World Market. Isn't it cute? I love tiny versions of things. I used a small piece of wood inside to hang it onto. A popsicle stick would do. A cute bow completes it.

Friday, June 18, 2010

Create Your Own Baby Blankets


I noticed one of the babies in the nursery at work was wrapped in a cotton gauze blanket which I thought was a really great idea. I looked up the website and thought they were pretty pricey (1 for $19.99, 4 for $44). So I decided to make my own and made them for about $7 each. Watch for sales at Joann and Hancock and pay even less. The gauze is great for summer.

I made these blankets about 45" square, which for 45" fabric, each blanket required 1 - 1/4 yards.
I folded over a 1/2" hem on all 4 sides and pressed. Then I folded over another 1/2" and pressed again. A hot steam iron really helps.


My machine does a lot of fun stitches, which I used on my blankets, but just a straight or zigzag stitch would be fine. I made some flannel blankets, too.


I found this cute alphabet print at Hancock. I love cute little animal faces.

I layered it with batting and backed it with muslin.

I machine quilted around each square.

I think there were 64 squares, but it really didn't take all that long.

It turned out to be really soft and cute.

I loved making these blankets. It is a great way to do a special baby gift. Especially for your baby's baby. : )

Monday, June 14, 2010

Homemade Pizza Dough

There is nothing like homemade pizza crust. It tastes sooo much better than the best you can buy in the grocery store. I use my basic roll dough recipe that I have posted several times. It is great for rolls, cinnamon rolls, cheese danish, cheese rolls, pepperoni bread, calzones, and PIZZA DOUGH. For the pizza toppings, I also think it's fun to scavenge through my refrigerator and use ingredients I have on hand to challenge myself to create culinary magic. I know. Kinda sad.

Here is my roll dough recipe again:

Basic Roll Dough

4 cups all-purpose flour
1 cup water
1 egg
1 stick butter, sliced
2 tsp salt
6 tbsp sugar
2 pkg yeast (either regular or rapid rise)

Place ingredients in bread machine. I like to add about 1/2 the water first, then the flour and other ingredients, including the rest of the water. Set the machine to the dough setting. This takes 90 minutes. When the cycle is over, roll the dough out onto a floured surface and cut into the desired sizes.

My toppings were: leftover grilled chicken, fresh basil, chopped red bell pepper, grated cheddar cheese, and a few strips of bacon. For my sauce I used Ragu Pizza Quick.

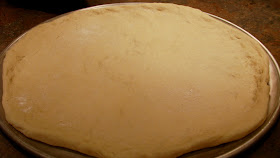
After the dough was ready, I divided it in half and sprinkled it with cornmeal as I rolled it out.

Then I placed it in a greased pizza pan. (I don't let it rise).

I covered it with my toppings.

Bake at 450° for about 20 minutes or until the crust is golden around the edges. This pizza did not last long at my house.


While it is baking you can reserve the other half of the dough for future small personal pan pizzas. I divided it into 5 portions and rolled them out individually. Then I separated them with pieces of parchment paper.


I wrapped them with plastic wrap and put them in the freezer. When you want to make small pizzas, you can pull as many as you need out of the freezer and place the toppings on them and bake them without thawing them first. How easy is that?


Tuesday, June 01, 2010

Tie Dye, Part Two: Onesies

This is my second installment of my tie dye adventures. I was inspired by the anticipated arrival of my grandson to try a onesies project. Please refer to my first post for any basic instruction, such as types of dye, etc.

I bought onesies at Walmart and prewashed them. I dampened them with water before I dyed them. For this one, I did the spiral technique. Place a fork at the center of where you want the spiral and begin to twist it.

Continue twisting...

Once you have twisted it into a circle, add rubber bands and apply dye to the front and back of each section. I used orange, yellow, lime green, and brown.


This is how it turned out.
After I finished each one, I wrapped it in plastic wrap and let it sit for several hours. I understand that there is a microwave technique that will set the heat but I haven't tried that yet.

You can also section it off like this:


I did several solid ones. They still had a mottled, hand-dyed look, which I liked.

I placed the rubber bands on the middle of this one. I don't have the pictures of it, but I dyed the onesie a turquoise color and the sectioned-off part a denim blue.

I made a pair of white knit pull-on pants and dyed them a solid denim blue to match the onesie.

And this is the outfit. The pants looked stonewashed.

I hope this helps to give you some fun ideas for tie dyeing onesies. It is a fun and inexpensive project and it makes a great gift. I will be posting a lot more fabric dyeing ideas soon!