Navigation menu

Wednesday, April 10, 2013

Chocolate Cupcakes with Buttercream Icing


This recipe is adapted from a Martha Stewart recipe, and they are amazing.

Chocolate Cupcakes
3/4 cup unsweetened cocoa powder
3/4 cup all-purpose flour
1/2 teaspoon baking powder
1/4 teaspoon salt
3/4 cup (1 1/2 sticks) unsalted butter, room temperature
1 cup sugar
3 large eggs
1 teaspoon vanilla extract
1/2 cup sour cream

Preheat oven to 350 degrees. Line 12-cup standard muffin tin with paper liners.
Into a medium bowl, sift together cocoa, flour, baking powder, and salt; set aside. In a mixing bowl, cream butter and sugar until light and fluffy. Add eggs, one at a time, beating well after each, then beat in vanilla. With mixer on low speed, add flour mixture in two batches, alternating with sour cream and beginning and ending with flour.

Pour batter into cups, filling each 3/4 full. Bake until a toothpick inserted in centers comes out with only a few crumbs, about 20 minutes. (Don't overbake.)

Cool in pan 5 minutes; transfer to a wire rack to cool completely, then pipe with Buttercream Icing. Decorate with chocolate shavings, if desired.

Buttercream Icing

1 cup butter, softened
1 pound confectioners' sugar
1 to 2 tablespoons cream
2 tsp vanilla

In a mixing bowl, cream butter until smooth. Add vanilla.
Gradually add confectioners’ sugar; beat until smooth. If too thick to spread, beat in 1 to 2 tablespoons cream.


Cream butter, sugar, eggs, and vanilla.

Add the cocoa mixture and mix well.

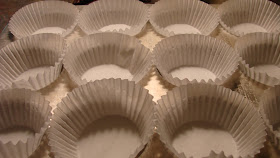
Line a muffin tin with cupcake cups.

Spoon batter into the cupcake cups, about 3/4 full. (This made 16 cupcakes for me, but you could fill them fuller and make 12).

Bake at 350 for about 20 minutes. Cool in muffin tin for 5 minutes, then on a wire rack until completely cool.

 Izzy loves to keep me company while I cook.


Pipe frosting onto cupcakes.

Sprinkle with chocolate shavings.

Share with friends, if desired. (optional)


Friday, February 01, 2013

Icy Chocolate Cups

This is a Nestle recipe that I have had for many years. The chocolate mixture in the original recipe is poured into 12 foil muffin cups, but I found these cute miniature trifle bowls at Walmart that I wanted to try. They turned out nicely, but these trifle bowls make for a fairly large serving.


Icy Chocolate Cups


18 chocolate wafers, crushed (I used Oreos)
3 tbsp melted butter
2 cups miniature marshmallows, divided
1 1/4 cups milk chocolate morsels
1/2 cup half and half
1 cup heavy cream, whipped
1/2 cup chopped cashews

In a small bowl, combine chocolate crumbs and butter. Set aside. Spoon 1 tbsp mixture into 12 foil-lined muffin cups; press firmly. (If you use a larger serving container like I did, use about 2 tbsp of the cookie crumb mixture). Set aside remaining cookie crumbs.

In a medium saucepan over low heat, combine 1 - 2/3 cups marshmallows, chocolate morsels, and half and half. Stir until mixture is smooth. Remove from heat and cool completely. Fold in whipped cream, remaining 1/3 cup marshmallows, and cashews. Pour into prepared muffin cups or serving containers. Sprinkle with cashews and remaining cookie crumbs. Freeze until firm.

Melt the chocolate morsels and 1- 2/3 cups of the marshmallows with the half and half over low heat:

Beat the heavy cream until whipped:

I used a mallet to crush my chocolate cookies to keep it clean and simple, but for really fine crumbs, I recommend a food processor.

Fold whipped cream, additional marshmallows, and cashews into the chocolate mixture. (I personally did not like the additional marshmallows because they were distracting to the smoothness of the texture, but definitely add them if you are a marshmallow fan).

This recipe filled four of these trifle bowls plus three small ramekins.

Place cookie crumbs in the bottom. Fill with chocolate mixture, top with cookie crumbs and cashews, and freeze.

I got these Pepperidge Farm wafers to serve with them:

They taste like a frozen chocolate mousse. I recommend serving them after a light meal because they are more enjoyable if you're not too full.

Tuesday, January 29, 2013

Open Up a Can of Worms

(Note: I am reposting this from a couple of years ago.)


Not real worms, of course.


I like to send Amby and Nathan a box of Valentine surprises every year. For one of the surprises, I decided to make the pop top cans I posted about last Christmas, except this time with custom labels. For a complete tutorial on how to make these, go here.

I have downloaded a large variety of fonts from dafont.com. I used Printshop for Mac and pulled up a blank page. Then I typed in their names and nicknames in various fonts. I thought that black on white with a single red heart would look cool.

I printed the labels onto white card stock and cut them into the size that would fit the cans I chose. You can gently remove the original can label and use it as a template if you need to.

I filled the cans with Brite Crawlers. I glued the bottoms back on and placed two heavy books on top of the cans for about 30 minutes. I tried Alene's Clear Tacky glue this time and really liked it.

Ahhh... the finished product. Nothing says I love you quite like a can of worms.

I tucked them away in their Valentine box and sent it off to Oklahoma.

This project is really fun and is suitable for any occasion!

Monday, January 28, 2013

Mediterranean Style Grilled Chicken and Spinach Pizza

I finally bought myself a grill pan (which I had wanted for years), and I used it to cook the chicken in this recipe. I found it at T. J. Maxx for only $16. I had seen grill pans used often on Food TV, and grilling on them always looked fun and easy. All the "celebrity" cooks are so annoying because, without exception, they seem compelled to comment on the beautiful grill marks they end up with. It really grosses me out. Of course, they are on national television, and I am not. :-)


Mediterranean Style Grilled Chicken and Spinach Pizza
1 pizza crust (I used Mama Mary's 100% Whole Wheat)
6 - 8 ounces cream cheese, softened
1 tsp dillweed
fresh baby spinach leaves
2 tbsp butter
1 chicken breast, grilled (I grilled three at a time and used the other two for a different recipe)
Colonel Paul's Cajun Seasoning
Blackening Spice
salt and pepper to taste
1/2 jar of marinated artichokes, red pepper, and green olives, chopped
kalamata olives, pitted and chopped
feta cheese crumbles
shredded cheddar cheese

1. Season chicken with spices and grill as desired. Chop into bite-sized pieces.
2. In a separate pan, sauté spinach in butter until just wilted. Set aside.
3. Mix dill into cream cheese and spread onto pizza crust.
4. Add chicken, spinach, kalamata olives, and artichoke mixture. Sprinkle with cheeses.
5. Bake at 350° for about 20 minutes, or until cheese is bubbly.


Spray grill pan with Pam and heat on medium-high heat:

Season the chicken and place on the pan. These chicken breasts were fairly thick, so it took 20-25 minutes to cook them through. Adjust the temperature so you don't burn them.

If I were a TV celebrity, I would comment on the grill marks.

I used a little over 1/2 a bag of baby spinach. You can use more if you would like. It cooks way down.

Saute in butter just until wilted:

Use any pizza crust you want, but this one is really good:

It comes pre-poked with puzzling holes:

Spread the cream cheese mixture onto the pizza crust and top with the remaining toppings:

Sprinkle generously with crumbled feta and shredded cheddar cheeses:

Bake at 350° for about 10-15 minutes.

This pizza is full of amazing texture and flavor combinations. We loved it. All Gil could say was, "Wow." All I could ask was if he had noticed the grill marks.

Felt Fortune Cookies

This is a Martha Stewart project. The link to it can be found here. I didn't do it exactly as she suggested. I actually got ideas from a couple of her commenters.

Materials Needed:
felt
pipe cleaners or wire
hot glue
candies
fortunes

First of all, I thought her suggested circle size of 4-1/2" was too small. I made a circle (just under 5") on my computer and printed it onto card stock. I used it as a pattern for my felt circles.

Martha suggested wire to place across the middle. I used a pipe cleaner which I trimmed with a wire cutter.

I also used hot glue because it's faster. Don't burn your fingers.

Print or write out a fortune to place in the cookie. I googled funny one-liners and printed some of those. One of my favorites was, "The severity of the itch is inversely proportional to the ability to reach it." Another one was, "Knowledge is knowing a tomato is a fruit; Wisdom is not putting it in a fruit salad." Who doesn't love a little after dinner sarcasm?

You can also place candy inside, which I found to be quite tedious. Maybe a smaller piece of candy would work better. The Hershey Kiss did work, but I had to fanagle with it a lot.

Fold over:

Be careful to grasp the candy as you pinch the edges together:

Then fold at the pipe cleaner:

This was an arduous project, but I did finally get the hang of it, and I will definitely do it again. These would be fun for other occasions as well.

"Before you criticize someone, you should walk a mile in their shoes. That way, when you criticize them, you're a mile away and you have their shoes."

Saturday, January 26, 2013

Julia Child Brownies, Squared

My favorite brownie recipe is by Julia Child from her cookbook, Baking with Julia. They are moist, chewy, and full of intense chocolate flavor. I posted the recipe a while back and it is here. The reason I posted it again is because I tried them in a new pan. The pan on the left is one I found at Target. It is the equivalent to a regular muffin tin. I have used it for cornbread, brownies, muffins (peach), and individual meatloaves. The square shape just makes it more fun.

The pan on the right is a new one. I found it at Michaels in the Wilton section. It would be the equivalent to a mini-muffin tin and it is made of silicone.


Silicone pans are easy to use, help prevent overbaking, and can even fold for storage.


If you haven't tried a silicone pan yet, one thing you need to know is that you have to place it on top of a cookie sheet to stabilize it.

These are the brownies after I baked them. It's good to let them cool a few minutes before you try to pop them out.

Then let them finish cooling on a rack.

A sprinkle of confectioners is essential.

These are so good, and perfect for any occasion that calls for chocolate, which is every occasion.