This is a project we did back in May of this year. We have a built-in bookcase in our guest room in dire need of a redo. In anticipation of my grandson, Roman, I decided to cheer it up with some fabric and add some of Amby and
Zac's favorite children's books. This is the before picture. It was a little tired.

Gil helped me take out the shelves.

The room is an apricot with turquoise accents so I chose a fabric that would coordinate with that. I found this fabric at Joann's.

I ironed on a fusible web to the fabric to give it body. Then I trimmed it to fit. Gil applied spray adhesive the the back of the bookcase and we attached the fabric.
I added a coordinating piece of fabric to the top and bottom to hide my raw edges and add a little interest. This is the top:

And the bottom:

It added some fun and brightness to the room.

I filled it with treasures.

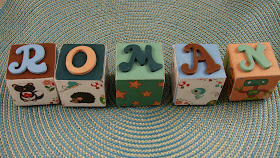
I made these blocks for Roman (obviously). My next post will show how I did it.

The back sides of the blocks spell his middle name.

The books are a mix of Amby and
Zac's, and also some of mine.

Gil bought this mama and baby raccoon for me when I had Amby. They were waiting for us at the house when we came home from the hospital with a sign that said, "Welcome home Vickie and Amby." I still have the sign, too.....sigh.

I painted the lids of two Ball jars and filled them with marbles to use as bookends. It took me a while to find marbles, but I finally found them at
Homewood Toy and Hobby. It seemed like marbles were everywhere until I actually started looking for them.

This is the Cheshire Cat from Alice in Wonderland. I bought it for my Dad when I was in
Disneyworld in 1973. The smile on his face reminded me of him. He loved it and always kept it on his desk. Needless to say, it is very special to me.
These books were a series that my mom ordered for me. I got a new one in the mail every month.

This is a three-car grouping of a wooden train Gil had when he was little. He still has the rest of it and I'm sure it will get lots of play time soon. The train is sitting on top of a set of Highlights magazines which belonged to my brother and me. The sock monkey is there just because he is cute and I love sock monkeys.

I found this adorable mouse at
A'mano in
Mountin Brook. His matchbox bed reminded me of Tom and Jerry cartoons, and books like The Borrowers, where the characters used found items to
repurpose into useful furniture for themselves. I love him and I named him Maddox. I know Roman will enjoy playing with him.

I actually have more adventurous plans for this bookcase which involve an entire apartment for Maddox. More to come.

 I was in a little bit of a hurry when I made these and didn't take enough photos. Sorry. My first step was to paint the 2 sides of the block where the letters were going, which become the front and back. Then I painted the letters in a contrasting color. You will be able to see that at the end.
 I used the paper on 4 sides of each block. I attached it to the unpainted sides.
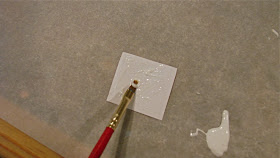
 I applied Alene's Tacky Glue to the paper and adhered it to the block.
 I trimmed all overhang with a scissor.
 Then I glued on the letters. I applied Mod Podge in a matte finish and over sanded, but neither of these steps is necessary.
 These are for my grandson, whose first and middle names happen to be the same length. That's because he has cool parents.
 Right now, they are on the bookcase in "his" room at my house.


